
Repairing pool tiles is the process of removing loose, cracked, or missing tiles, preparing the substrate, and reinstalling tiles with water‑resistant adhesives and grout. In Ras Al Khor, fast, first‑time‑right repairs prevent hidden leaks and surface damage. Service Zone UAE’s multi‑trade team handles tile fixing, leak checks, and finish work so your pool stays safe and beautiful.
By Mohammed Ali — Owner, Real estate Specialist
Last updated: May 22, 2026
Quick Summary
Fix loose or missing pool tiles by stabilizing the substrate, using pool‑rated thinset or epoxy, and grouting with flexible, water‑resistant materials. Control water chemistry (pH 7.2–7.8) before and after the repair, allow proper cure time before submersion, and address root causes like movement or leaks to prevent repeat failures.
Here’s what you’ll get from this complete guide, built for Dubai homeowners, tenants, and property managers:
- Clear definitions and causes of pool tile failure you can act on today
- Step‑by‑step methods for above‑waterline and submerged areas
- Pro‑level tools, materials, and safety tips for reliable results
- When DIY makes sense—and when to call Service Zone UAE
- Checklists, maintenance routines, and a practical decision table
- What is repairing pool tiles?
- Why quick repairs matter
- Step‑by‑step repair process
- Methods and materials
- Best practices
- Find the root cause
- Tools and resources
- Dubai‑based examples
- When to hire a pro
- Safety and compliance
- Post‑repair maintenance plan
- FAQ
What is repairing pool tiles?
Repairing pool tiles means removing failed tiles, correcting the substrate, and reinstalling tiles with pool‑rated adhesives and grout that withstand constant moisture, movement, and chemicals. The goal is to restore a watertight, long‑lasting finish and prevent leakage, surface spalling, or further detachment around the waterline and steps.
In practice, repairing pool tiles involves inspection, controlled demolition, cleaning, surface preparation, bonding, grouting, and curing. While the waterline is the most common failure zone, steps, benches, and skimmers also need attention.
- Typical triggers: fluctuating water chemistry, thermal expansion, substrate movement, and aged grout
- Typical locations: waterline bands, steps, spa spillways, skimmer throats, and expansion joints
- Success factors: sound substrate, correct adhesive choice, proper cure window, and stable water chemistry
Because Service Zone UAE operates from Ras Al Khor with multi‑trade technicians, we can address related issues—minor plumbing checks, carpentry for formwork, or finish painting—without multiple vendors or delays.
Why repairing pool tiles matters
Prompt tile repair prevents water intrusion, reduces evaporation losses through gaps, and protects the pool shell from progressive damage. Left alone, small failures expand, loosen adjacent tiles, and stain plaster. A quick, durable fix keeps your pool safe, attractive, and cheaper to maintain over time.
Here’s why acting early pays off for Dubai homes and facilities:
- Water loss control: Even hairline voids let water migrate behind tiles, undermining adhesion and increasing makeup water needs.
- Structure protection: Moisture behind finishes accelerates efflorescence and freeze‑thaw style micro‑cycles from night/day swings.
- Chemistry stability: Stable pH, alkalinity, and calcium hardness extend grout and adhesive life; unstable water shortens it.
- Safety and hygiene: Loose edges can cut feet and harbor biofilm; repairs restore smooth, cleanable surfaces.
- Cost containment: Addressing a single popped tile now is far simpler than re‑tiling entire bands later.
For owners managing rentals or shared amenities, quick repairs also minimize complaints and downtime, especially during peak swimming months.
How pool tile repair works (step‑by‑step)
Effective pool tile repair follows a disciplined sequence: isolate the area, remove failed tiles and thinset, prepare a sound substrate, set tiles with pool‑rated adhesive, grout with water‑resistant material, and respect cure times before refilling. Stabilize water chemistry after submersion to protect the new work.
- Isolate and lower water (if needed): For the waterline band, drop the level a few inches below the repair zone. For submerged tiles, plan a partial drain and safe pump‑out.
- Demolish precisely: Tap loose tiles free; use a carbide scraper to remove old thinset. Avoid gouging the render or shotcrete shell.
- Clean thoroughly: Vacuum dust, degrease, and rinse. The substrate must be clean, sound, and slightly damp—not wet—before bonding.
- Address the substrate: Skim low spots; rebuild edges; honor movement joints. Let patching materials set per manufacturer guidance.
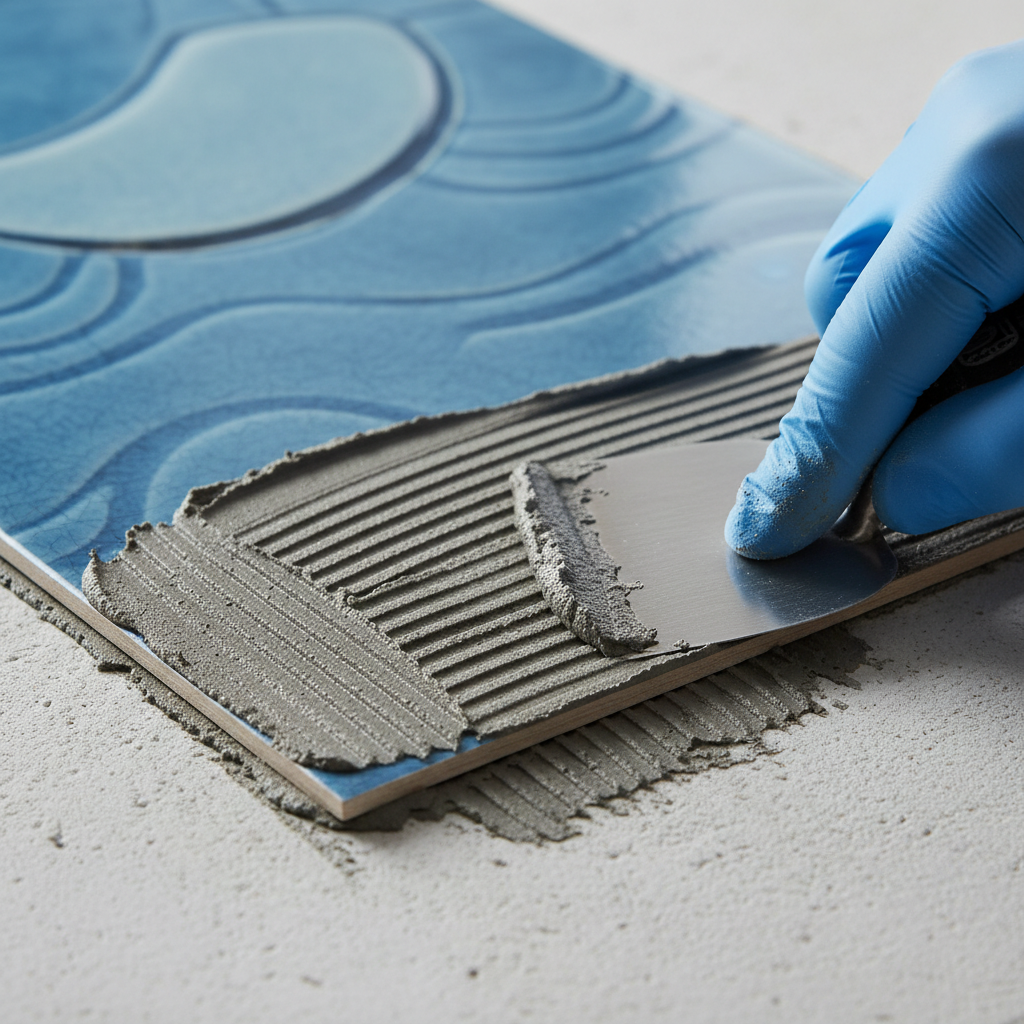
- Set tiles: Apply pool‑rated thinset (or epoxy where specified). Press tiles with slight twist for full coverage; use spacers to maintain joint width.
- Grout: Use water‑resistant grout with additive or epoxy grout for spillways. Tool joints smooth and consistent.
- Cure and protect: Shield from splash for 24–48 hours; many installers allow several days before submersion. Verify product‑specific cure windows.
- Refill and balance: Bring pH to ~7.2–7.8 and maintain sanitizer and alkalinity targets to protect the repair.
| Step | Key checkpoint | Typical window | DIY or Pro? |
|---|---|---|---|
| Substrate prep | Surface is sound, clean, flat | Same day | DIY with care |
| Tile setting | Full adhesive coverage, consistent lines | 1–2 hours active | DIY or Pro |
| Grouting | Uniform joints, proper tooling | 1–2 hours active | DIY or Pro |
| Cure before water | No splash, no movement | 24–72 hours+ | Follow specs |
Need to shield deck furniture during work? Store it clean and dry using our secure storage service so the work zone stays clear and safe.
Types, methods, and approaches
Choose your method based on location and cause: waterline bands often use polymer‑modified thinset and flexible grout; spillways and constantly wet edges may benefit from epoxy systems; movement joints require silicone or elastomeric sealant. Fit the material to the moisture exposure and movement.
Here’s a quick way to match method to problem:
- Waterline band: Polymer‑modified thinset + sanded grout with additive; re‑seal expansion joints with pool‑safe silicone.
- Spillways/overflows: Favor epoxy adhesives and grout for constant wetting and thermal cycling.
- Steps/benches: Emphasize slip‑resistant tile; verify nosing coverage and joint uniformity.
- Skimmer throats: Use small formats; keep joint transitions neat to the plastic skimmer mouth.
- Structural movement: If tiles keep popping, add or re‑establish movement joints at 6–12 mm where appropriate.
For owners curious about pool structure fundamentals, this overview of reinforcement and shell behavior provides helpful background on why rigid finishes need controlled movement paths (pool rebar basics).
When a repair borders timber formwork, custom trims or templates may help—our carpentry team fabricates these quickly to keep the tile lines true.
Best practices for reliable results
The best pool tile repairs combine clean prep, the right adhesive, patient curing, and balanced water. Respect expansion joints, avoid submersion too soon, and stabilize pH, alkalinity, and sanitizer. Small discipline now prevents rework, staining, and new failures along the band.
- Prep like a pro: Remove 100% of loose thinset; vacuum dust. Bonding to dust or paint films guarantees failure.
- Right adhesive: Use pool‑rated thinset; switch to epoxy for constantly wet spillways.
- Cure window: Shield from splash for at least 24–48 hours; many installers wait longer before submersion per product guidance.
- Balance chemistry: Keep pH roughly 7.2–7.8 and avoid aggressive shocks aimed directly at fresh grout lines.
- Honor movement: Re‑establish expansion joints with silicone; never grout across them.
- Clean and seal: After full cure, clean grout lines; see practical tile and grout cleaning basics for care routines.
- Finish details: If nearby coping or walls need a refresh, our painting service matches colors and finishes neatly.
For adjacent decks or sun shelves getting upgraded, durable substrate prep principles carry over—our SPC floor prep guide shows why flat, clean bases matter for long‑life finishes.
Diagnosing tile failure: find and fix the root cause
Lasting repairs start with diagnosis. Identify whether failure came from movement, bond breakage, water chemistry, or an active leak. Correct the cause—rebuild weak edges, restore joints, stabilize chemistry, or repair the leak—before resetting tiles. Otherwise, new work will fail again.
Run this fast, field‑tested checklist before you set a single tile:
- Movement patterns: Linear popping often signals missing expansion joints; cracking around corners suggests stress concentrations.
- Adhesive clues: Thinset stuck to tile (not the wall) points to dusty or painted substrate; the reverse indicates poor tile back coverage.
- Chemistry history: Etched grout, scale, or efflorescence reveals water balance issues that must be addressed.
- Leak screening: Conduct a bucket test, dye test at suspect cracks, and inspect fittings. For basics, see this DIY leak check primer.
- Moisture content: If the render is damp, allow dry‑back time or use materials suited for residual moisture per specification.
Where a leak is suspected inside walls or equipment lines, our team coordinates minor plumbing checks to confirm integrity before tile goes back up.
Local considerations for Ras Al Khor
- Plan repairs outside peak midday heat to reduce rapid surface drying and improve adhesive open time.
- Expect higher swim demand on weekends and holidays; schedule work mid‑week to minimize amenity downtime.
- Dust from active development zones can settle on surfaces—wipe substrates immediately before bonding.
Tools and resources
A successful repair needs clean demolition tools, mixing gear, notched trowels, spacers, and pool‑rated thinset or epoxy with compatible grout and sealant. Add PPE, moisture meters, and shade canopies. Organize staging and storage to keep the work zone safe and dust‑free.
- Demolition and prep: Carbide scrapers, margin chisels, oscillating tool, shop vac, straightedge, sponge set.
- Setting and grouting: Mixing paddle, scale for ratios, 1/4″ notched trowel, spacers, rubber float, misting bottle.
- Materials: Pool‑rated thinset/epoxy, grout (cementitious with additive or epoxy), silicone for movement joints.
- Controls: Shade or canopy, painter’s tape, plastic to keep splash off fresh work.
- PPE: Cut‑resistant gloves, eye protection, knee pads, hearing protection, respirator as needed.
Protect outdoor furniture and décor while you work—our Storage Service keeps items out of the dust zone and returns them spotless when the pool reopens. For surface prep insight on rigid finishes, see this pool structure explainer connecting reinforcement to finish performance.
Coordinating multiple trades? We can align tile, minor carpentry fixes, and even edge repainting via our painting team so your schedule stays tight.
Case studies and Dubai‑based examples
Real‑world repairs in Dubai show patterns: waterline bands fail from movement and chemistry swings; spillways suffer constant wetting; skimmers crack at transitions. Fixing the root cause—and rebuilding joints—keeps new tiles stable through hot days and cool nights.
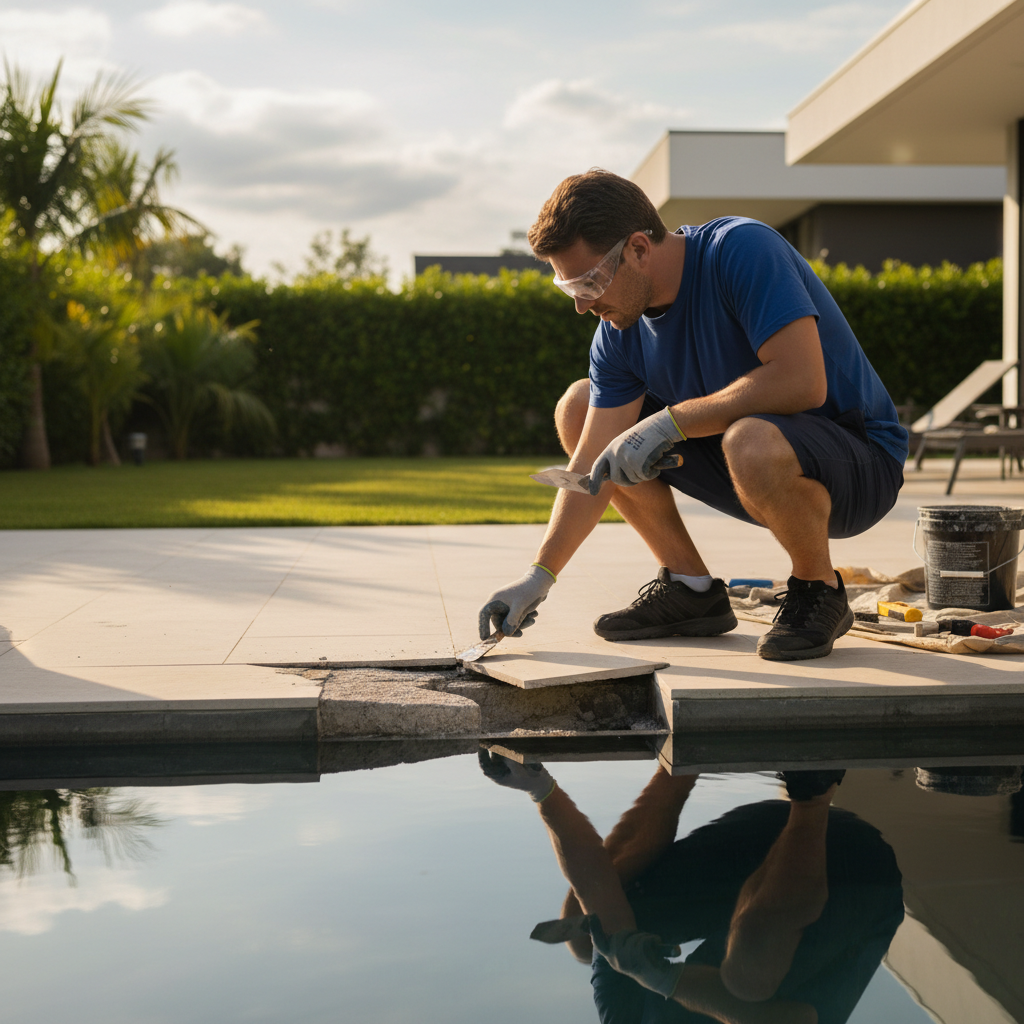
Example 1 — Ras Al Khor villa waterline band: A 3‑meter section of waterline mosaics popped after a season of heavy use. Our team removed loose sections, rebuilt a shallow ridge with patch mortar, restored a silicone movement joint, set mosaics with pool‑rated thinset, and grouted with additive. The owner waited several days before submersion and stabilized pH. No further movement observed through peak summer.
Example 2 — Shared pool steps in a residential complex: Step nosings had chipped edges and hollow sounds. We removed failed pieces, flattened nosing planes, switched to a slip‑friendly tile, and used epoxy at the leading edge where splash‑out was constant. The HOA implemented a monthly chemistry log and quarterly grout checks.
Example 3 — Spa spillway refresh: Constant overflow etched cementitious grout. We replaced with epoxy grout, re‑sealed adjacent joints, and provided a short care guide. The smooth finish improved cleanability and reduced staining.
When amenities are being painted or upgraded around the pool deck, our painting service coordinates edging and masking so finishes meet cleanly, avoiding touch‑ups later. For move‑out scenarios or large renovations, see our multi‑discipline moving + storage + painting tips to stage spaces efficiently.
When to hire a professional
Hire a pro when tiles fail repeatedly, when repairs touch spillways or submerged zones, or when leaks or structural movement are suspected. A trained, multi‑trade crew diagnoses the cause, sequences the work, and delivers a durable, warrantable finish without unnecessary downtime.
- Diagnostics needed: Recurrent popping, linear cracking, or rapid grout erosion signals deeper causes.
- Challenging locations: Skimmer throats, radiused edges, or submerged repairs are less forgiving of errors.
- Time pressure: Rental turnovers and facility schedules benefit from coordinated trades and fast, neat execution.
- Finish integration: Need carpentry trims or repainting after tile? One team avoids gaps and delays.
Soft CTA: If you’re in Ras Al Khor or anywhere in Dubai, Service Zone UAE can inspect, diagnose, and complete tile repairs alongside related finish work. Explore our carpentry, painting, and storage options to simplify logistics.
Safety and compliance
Safety starts with controlled demolition, dust management, PPE, and safe water handling. De‑energize nearby equipment, isolate work areas, and prevent slips around wet edges. Respect manufacturer SDS guidance for adhesives and grouts, and follow local environmental rules for draining and refilling.
- Dust and chips: Use eye/hand protection and vacuum extraction; keep swimmers away until debris is cleared.
- Electrical safety: Lock out pumps and lighting circuits near cutting or wet work.
- Chemical handling: Mix adhesives/grouts per SDS, ventilate, and avoid skin contact.
- Water management: Direct drain water responsibly; protect landscaping and paved areas.
- Site control: Barricade the work zone and post simple “area closed” signage until the cure window passes.
Maintenance plan after repair
After tiles are reset, protect the finish with stable water chemistry, gentle cleaning, and periodic joint checks. Log pH and sanitizer weekly during the first month, avoid harsh shocks on fresh grout, and inspect movement joints quarterly to keep the band intact.
- First month: Record pH/alkalinity weekly; brush gently; no pressure washing.
- Quarterly: Inspect grout and silicone joints; touch up sealant where needed.
- Seasonal: Schedule a visual once‑over before heavy use periods; plan minor fixes early.
- Annual: Consider a deep clean and small‑area re‑seal for grout in high‑splash zones.
Refinishing nearby features? Coordinate with our painting and carpentry teams so joints, trims, and color breaks align perfectly across trades.
Frequently Asked Questions
Can I repair a few waterline tiles without draining the whole pool?
Yes. For small waterline repairs, lower the water level just enough to expose the work zone. Keep the area dry during setting and grouting, and wait through the full cure window before refilling to the normal level.
How long before repaired tiles can be submerged again?
Most cement‑based systems need at least 24–48 hours splash‑free and often several days before full submersion. Epoxy systems vary. Always follow your specific product’s instructions for cure times in wet environments.
Which adhesive and grout should I use for pool tiles?
Use pool‑rated polymer‑modified thinset for most waterline zones and epoxy adhesives/grout for constantly wet areas like spillways. Match grout type to exposure, and re‑establish movement joints with silicone sealant instead of grout.
How do I stop tiles from popping again?
Fix the root cause: stabilize the substrate, honor movement joints, ensure full adhesive coverage, and maintain balanced water chemistry. Without addressing these factors, new tiles can debond along the same line.
Can you check for leaks before resetting tiles?
Yes. Basic screening includes bucket and dye tests and inspections around fittings. If indicators suggest a plumbing issue, our team coordinates targeted checks before reinstalling tiles to avoid repeat failures.
Conclusion and next steps
Durable pool tile repair is a disciplined process: diagnose the cause, prep perfectly, choose the right system, respect cure times, and keep water balanced. Do that, and even small, targeted fixes last through Dubai’s hottest months.
Key takeaways
- Match method to exposure—waterline vs. spillway vs. submerged areas.
- Prep and movement joints decide longevity more than anything else.
- Cure fully and stabilize chemistry before returning to service.
- Use a coordinated team to handle trims, repainting, and storage logistics.
Action steps
- Mark all loose tiles and inspect for linear patterns that hint at movement.
- Decide on DIY vs. pro using the process table above.
- Stage the work zone and protect belongings with our Storage Service.
- In Ras Al Khor, book a quick inspection so we can confirm the root cause and plan the right fix.
Ready to restore your pool’s tile band the right way? Schedule a friendly consultation in Ras Al Khor and wider Dubai—Service Zone UAE will coordinate tile fixing, minor plumbing checks, and finish work so you can dive back in with confidence.